How to Cut Your Own Handwriting in Silhouette Studio
Monday, June 30, 2014
One of our many talented readers shared a Father's Day Silhouette project she made on our Facebook page and you all went crazy for it. It was a picture frame that included a handwritten note from her late father...the note had been cut on vinyl and stuck on the glass. Since many of you asked how it was done, I thought I'd share a tutorial on cutting your own handwriting in Silhouette Studio.
Not to get all sappy on you, but my ninth wedding anniversary is coming up so I thought I'd use the handwritten note my husband gave me (stuck on a mirror) when he proposed more than 10 years ago to demonstrate. Plus, it's a two for one for me because I get to share a tutorial and make him a gift. Nothing like mulit-tasking!
Silhouette Rhinestone 101 Tutorial (Designer Edition Not Needed)
Friday, June 27, 2014
Are you ready to get started? I'll share a free cut file with you. Hooked ya, didn't I? Good! Let's talk basics today.
Silhouette School's '10,000 'Thank Yous Giveaway!'
Thursday, June 26, 2014
I've said it before and I'll say it again....THANK YOU! This week Silhouette School did what I thought might be possible in a few years. Instead, we reached 10,000 Facebook fans in just five short months since launch. Even as I write this I am overwhelmed by it all...I'm just a stay at home mom who pecks away during nap time hoping to provide a tip or two a day on a machine that I think is quite simply as amazing as it is versatile.
I also think all10,000 11,000+ of you are amazing! This was supposed to be the 10k Thank You's Giveaway, but in just the few days I've spent planning this giveaway we've hit yet another social media milestone. It wouldn't have been possible with each and every one of you.
Silhouette School is a one woman show and when you're working on a budget of zilch every 'like', share, tag, click, post view, and kind comment you leave is so important to growth and success. And so you see it really is because of all of you that Silhouette School has become such a success in such a short period...and for that I can't thank you enough.
So...to show you just how much I appreciate you I have a big ol' giveaway. I mean just look at the prize pack!
I also think all
Silhouette School is a one woman show and when you're working on a budget of zilch every 'like', share, tag, click, post view, and kind comment you leave is so important to growth and success. And so you see it really is because of all of you that Silhouette School has become such a success in such a short period...and for that I can't thank you enough.
So...to show you just how much I appreciate you I have a big ol' giveaway. I mean just look at the prize pack!
8 Tricks to Working With and Cutting HUGE Silhouette Stencils or Decals
Wednesday, June 25, 2014
So you have a stencil or a vinyl decal that you want to cut on your Silhouette, but it's super sized? No problem! Today I'm going to share 8 tricks and tips with you on cutting and working with huge designs that can't be made in a single cut on any of the Silhouette machines.
Silhouette Tutorial: Cutting Longer Than the Mat
Tuesday, June 24, 2014
If you checked out my post a few weeks go on the Faux Vinyl Garage 'Windows' I installed, than you got a quick and dirty mini tutorial on cutting longer than the Silhouette mat. But since it was kind of just a footnote I figured it was worth repeating here since I know many of you don't want to be limited by the 11 or 12" cutting mat when cutting vinyl.
One of the nice things about vinyl is that you don't have to cut it with the cutting mat. That means your only limitation is the width and even that we can get around. You have seen my tutorial on cutting over-sized stencils, right? The same basic principals work for vinyl, too. Anyway, since vinyl comes in 10 foot rolls you could hypothetically cut the entire roll in one cut.
But how to do that...the key to cutting vinyl longer than the cutting mat is your settings. You have to make some adjustments to them because if you cut like the defaults are set for, only the part of your design inside the cut area (basically most of the mat) will cut. You can see in this example, where I'm cutting out my 'window panes', only the first two panes and a portion of the third will cut because the cut line is currently set to 8.5 x 11 (standard Portrait).
Silhouette Studio Word Art Tutorial
Monday, June 23, 2014
How to Mirror Wrapped Text (for HTV) in Silhouette Studio
Friday, June 20, 2014
"How do you mirror image (the wrapped text) so you can cut HTV?"
This is often needed if you want to make a logo - especially on the chest - for a t-shirt.
Michele brings up a good point because for Heat Transfer Vinyl you must mirror your image, especially if you have text, because when you flip it onto your shirt or fabric, it will be opposite of the way it cut. If your image includes wrapped text, however, if you simply mirror it, it won't work.
Silhouette Studio Designer Edition: 13 Reasons Why It's Worth the Upgrade
Wednesday, June 18, 2014
The questions surrounding Silhouette Studio Designer Edition are many...but the two biggest are is it worth the price and what is so different from the standard software that comes with the Silhouette machines?
Today we're going to delve into designer edition - not so much about how to use it - but more about what it includes and why users benefit from it and the expanded tools and options it provides.
First of all to upgrading to Silhouette's Designer Edition is NOT the same as upgrading from Studio V2 to Version 3. The V2 to V3 upgrade is a free upgrade that you can download from the Silhouette America website to get the new software.
Upgrading to Designer Edition actually gives you more functions - but at a cost. The retail price is listed at $49.99, but you can often find the DE download cards on Amazon for around $32....recently we had a deal alert when the Designer Edition card dropped to $25! If you cashed in then, but are now wondering "what the heck do I do?" we're here to help...or maybe you're wondering if it's worth spending the extra cash to get the added features. Hopefully today we'll help you decide if DE is something that would benefit you creatively.
Labels:
Basics,
Designer Edition,
How to,
How to...,
Reviews,
Saving Money,
Silhouette Studio,
Upgrades
DIY Photo Phone Case Cover: Silhouette Print And Cut Tutorial (Free .Studio Cut File)
Tuesday, June 17, 2014
My phone is full of pictures of my kids and now my phone case is adorned with their adorable little faces, as well. This is actually a really easy project to do using the Silhouette. I have the iPhone4 and used a blank case from Punch Place Plus. They have a really nice selection of colors, have covers for various phones, and are super affordable....I'm talking a two-pack of phone cases for less than $2. (Plus, PPP has lots more than just phone cases so take a browse around if you're looking for anything from blank headbands to acrylic bracelets cuffs to doll shirts and so much more....all of which can be decorated with vinyl and/or HTV.)
How to Fill a Design With a Photo in Silhouette Studio (No Designer Edition Needed)
Monday, June 16, 2014
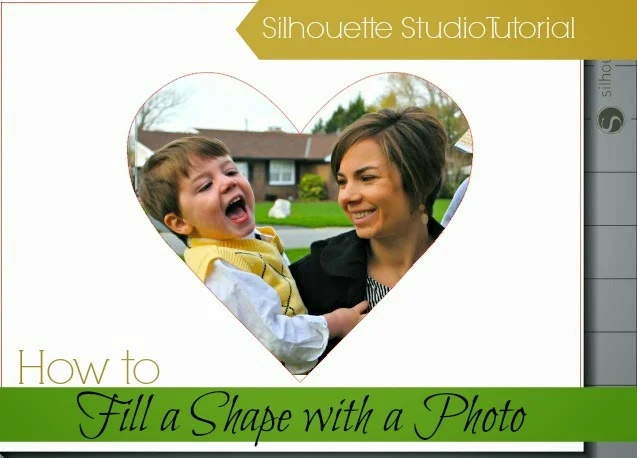
There's always more to learn, right?! Well that is certainly the case for today's Silhouette tutorial.
A few weeks ago I got an email from Sally. Sally was looking to put photos into a design in Silhouette Studio, that part she knew how to do (and soon you will too). But her question was this:
"I have been able to put photos in the rectangles or squares, but not able to move them around or resize them."Basically she wants to manipulate the photo once it's inside the rectangle (or any other shape for that matter) so she can determine how zoomed in the photo is and also to pan the photo around.
Well darn if Sally didn't stump me....but she also had me curious and so I set off to find a way.
Library Book Bags with Glitter Heat Transfer Vinyl (Free Studio Cut Files & a GIVEAWAY)
Friday, June 13, 2014
Well you just hit the jackpot my friends... not only do I have an awesome-sauce tutorial (okay, maybe I'm biased), but I also have two free studio cut files AND a $25 Expressions Vinyl Giveaway for you today. What more could you ask for on a Friday?!
I know what I could ask for: school to start (kidding, of course)! Let's just say we're a week into summer and the kids are already looking at me like "What now, Mom?" about every half hour. Thankfully our local library is only a few minutes away and the kids are always up for picking up some new books and DVDs. I thought I'd made it easy on us by making each of them a personalized book bag to carry their loot.
I picked up the canvas bags as the craft store for just $2 each. Then I got to work customizing them with glitter heat transfer vinyl from Expressions Vinyl. Expressions Vinyl has a huge selection of vinyl and tons of colors in the new glitter sheets. I went with teal and gold glitter HTV for my daughter's bag (and a mini matching bag for her American Girl) and neon blue, green, and orange glitter HTV for my son's superhero-inspired bag. If you're an HTV newbie, check out the basics tutorial here since we will touch on the steps, but not go into too much detail here assuming you have read the Heat Transfer Vinyl 101 lesson.
DIY Nursery Art: Silhouette Tutorial
Thursday, June 12, 2014
I finally decided that this special delivery would be perfect for another special delivery - a set of girl twins my cousin is expecting later this summer.
How to Paint a Stencil Without Bleeding
Wednesday, June 11, 2014
If you've ever made a paint stencil with you Silhouette you've probably run into this common problem: Paint Bleed! It's so frustrating that no matter how hard you press the edges of the stencil down, paint seems to somehow seep underneath leaving you with lines that just aren't that crisp. Today's lesson is a little trick for how to paint a stencil without bleeding.
Spikers Cup Holders Ideas: How to Personalize with Silhouette Vinyl
Tuesday, June 10, 2014
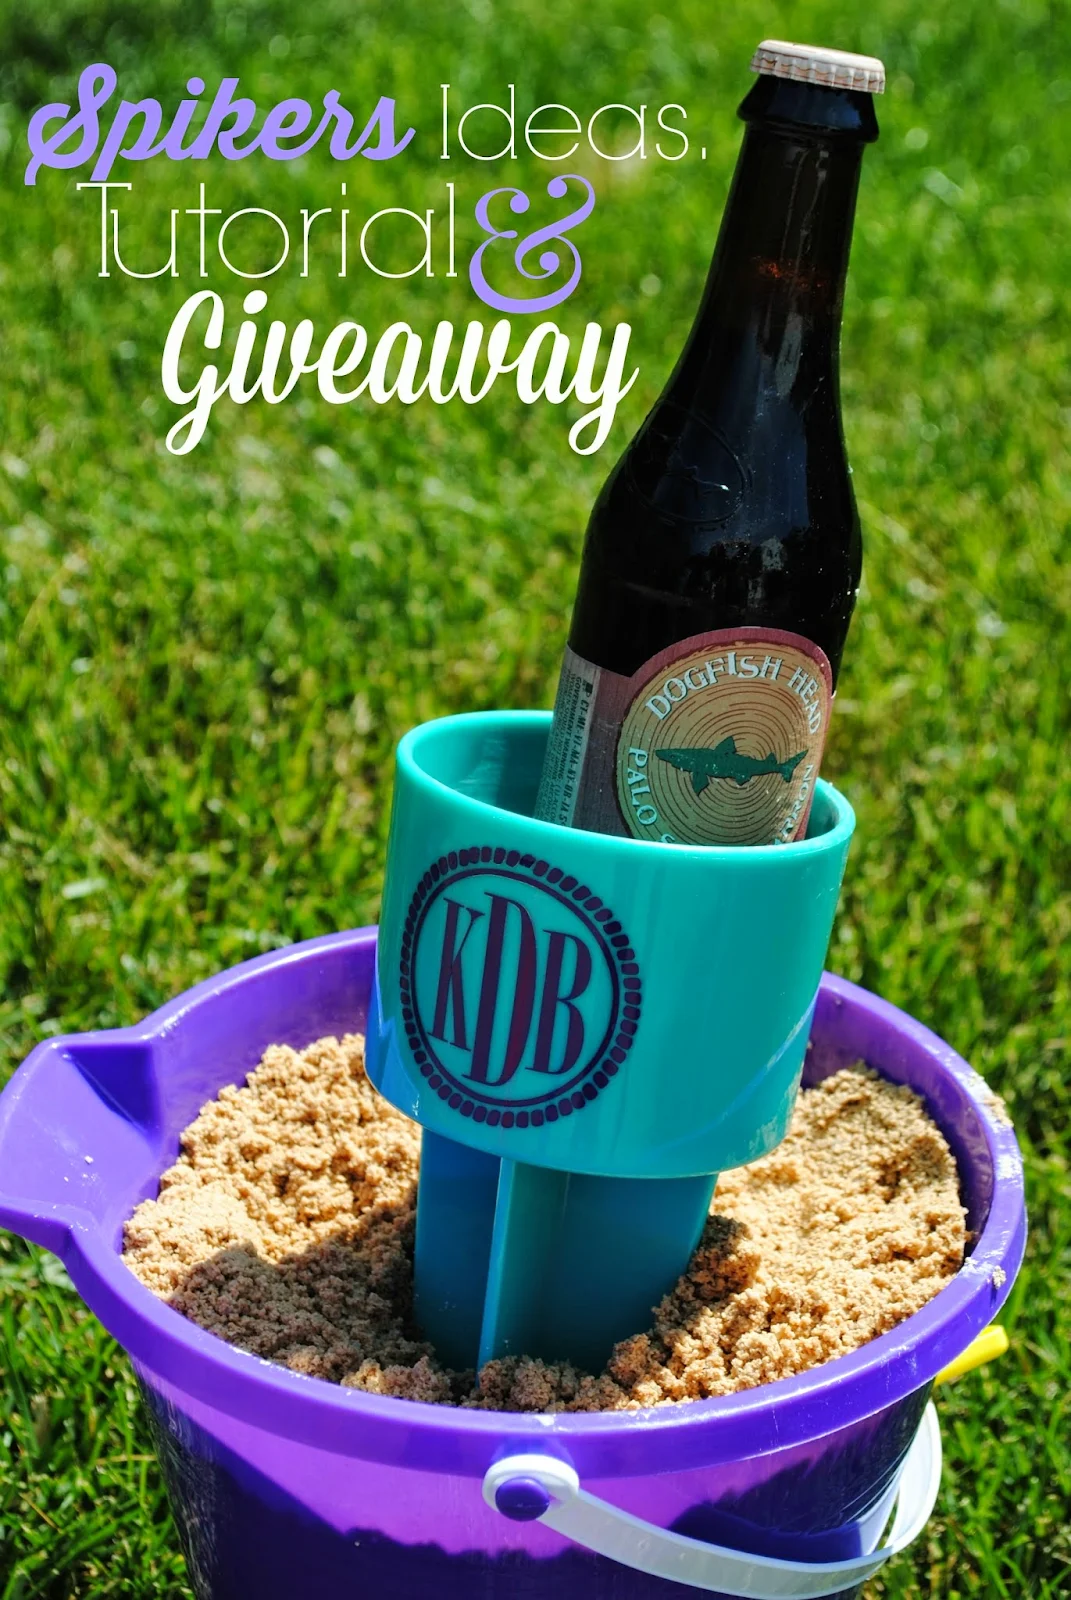
It's summer time and that means it's finally beach weather. If you're not on the Spikers bandwagon already, hop on now because these sand cup and phone holders are awesome for the beach! My Vinyl Direct has lots of colors of spikers and not only did they provide the spikers and vinyl for this tutorial, but we've teamed up for a giveaway so TWO lucky winners can score some free spikers (or whatever use their little heart desires)!
First let me show you how easy and fun it is to customize and personalize spikers. Pick your favorite color - there are a lot to choose from so go wild! With the spikers you want to use the glossy permanent adhesive so that you can wash them with no fear that the vinyl will be removed or peel up.
One of the things I was pleasantly surprised about is the size and the high quality of the plastic cup holders. These things are heavy duty thick plastic, but still light weight so they're not weighing down your beach bag. They're also big enough to not only fit a cup, can, bottle or juice box, but also a phone, sunglasses, or suntan lotion...anything you want to keep from getting sandy!
The surface are that you can decorate 3" tall so keep that in mind when you are making your design. All of my designs are just slightly smaller than 2.5" tall. Also, the opening is not tapered so your design should go on straight.
DIY Patriotic Nails Tutorial (And More Patriotic Silhouette Projects)
Monday, June 9, 2014
Let's just get one thing clear... I'm really being vulnerable today. I am very self conscious of my feet and hands (why won't my nails EVER grow? Why are my knuckles so wrinkly? What are those bumps?). Anyway, I think enough of you guys that I decided - even though I will never have a career as a hand or foot model - I will put it all out there on the blog today (as long as you don't look too close).
Now that that's out of the way...it's less than a month until July 4th already and I'm sharing my first patriotic Silhouette project today. This one was kind of a challenge for me (not only because it's my monthly contribution to the Silhouette Challenge group), but also because I'm terrible at painting my own nails (as you'll see), let alone blinging them out with special designs. Thankfully, my Silhouette made the job sooooo much easier!
The first thing I did was get my red, white, and blue nail polish. I picked them at the dollar store only because I can't really see myself wearing white or blue nail polish any other time of the year and I wasn't willing to shell out more than buck for a bottle.
Let's talk toes first since they were the easiest. I painted my big toes blue and then cut stars out of white permanent vinyl (651) and stuck them directly onto the the nail. I found that a design that's just about .75 square inch works well. Easy peasy and made even easier because I'm giving you the free cut .studio cut file to download. I planned to paint each of the other four toe nails red and white striped, but they were just too tiny...so I cheated and painted each nail a solid color.
Father's Day Photo Mat Cutout (Free Silhouette .Studio Cut File)
Thursday, June 5, 2014
Oh baby! Guess what....today we're taking a field trip!! I'm guest posting today's lesson over at My Paper Craze. Can you believe the lovely Becky and Glenna let me take control of yet another blog today? Craze(y), I know!
Anywhooo...I'm sharing a really fun (at least, I think so) and unique Father's Day gift that you can make for dad in just a few minutes. Plus, because you all are like my favorite readers ever, I'm sharing the free cut file.
I hope you'll hop on over and read today's lesson on making this Father's Day Photo Mat Cutout on My Paper Craze.
You May Also Like These Father's Day Ideas:
Thanks for coming to class today at Silhouette School. If you like what you see, I'd love for you to pin it!
How to Etch Glass (Silhouette Tutorial)
Wednesday, June 4, 2014
A few weeks ago when we gave away a free Silhouette Starter Kit, I asked which kit you would pick if you won. Lots and lots and lots of you said you'd like to try glass etching. The Silhouette Glass Etching Starter Kit is a good way to get started...or you can buy Armor Etch Cream and dollar store stencil 'vinyl' material and save a little money. That's the route I took. (Not because I have anything against the starter kits, I definitely don't, I just got the Armor Etch Cream on sale.)
Alright let's get started. The first thing you want to do is cut your stencil. For this design I did a google image search for the Facebook thumbs up, traced it and then typed out "Like" next to it. I live on coffee and Facebook (because I love my Silhouette School family!) so this mug about sums it up.
Alright let's get started. The first thing you want to do is cut your stencil. For this design I did a google image search for the Facebook thumbs up, traced it and then typed out "Like" next to it. I live on coffee and Facebook (because I love my Silhouette School family!) so this mug about sums it up.
You want to cut the stencil on either the Oramask 831 Stencil Film or the $1 dollar store knockoff version which I talked about in-depth here. If you aren't familiar with cutting a sticky stencil, head over and read that tutorial before you move on since this tutorial on glass etching will assume you know how to cut, transfer, and adhere the stencil to the glass so you're ready to etch.
Dollar Store Stencil 'Vinyl' Material for Silhouette
Tuesday, June 3, 2014
I am so excited to share this little tip with you today because it's gonna save you some money and there's not much I like more than a deal! The Dollar Tree and Deals sell rolls of Con-Tact Quick Cover Clear Self-Adhesive Shelf Liners for just $1 ($2 at Deals) that is a great substitute for Silhouette Stencil Vinyl.
The sticky Clear Cover has a backing that can be peeled off after it's cut - just like vinyl - and then transferred to another surface for stenciling.
The sticky Clear Cover has a backing that can be peeled off after it's cut - just like vinyl - and then transferred to another surface for stenciling.
Last Day of School Autograph Shirt (Free Silhouette .Studio Cut File)
Monday, June 2, 2014
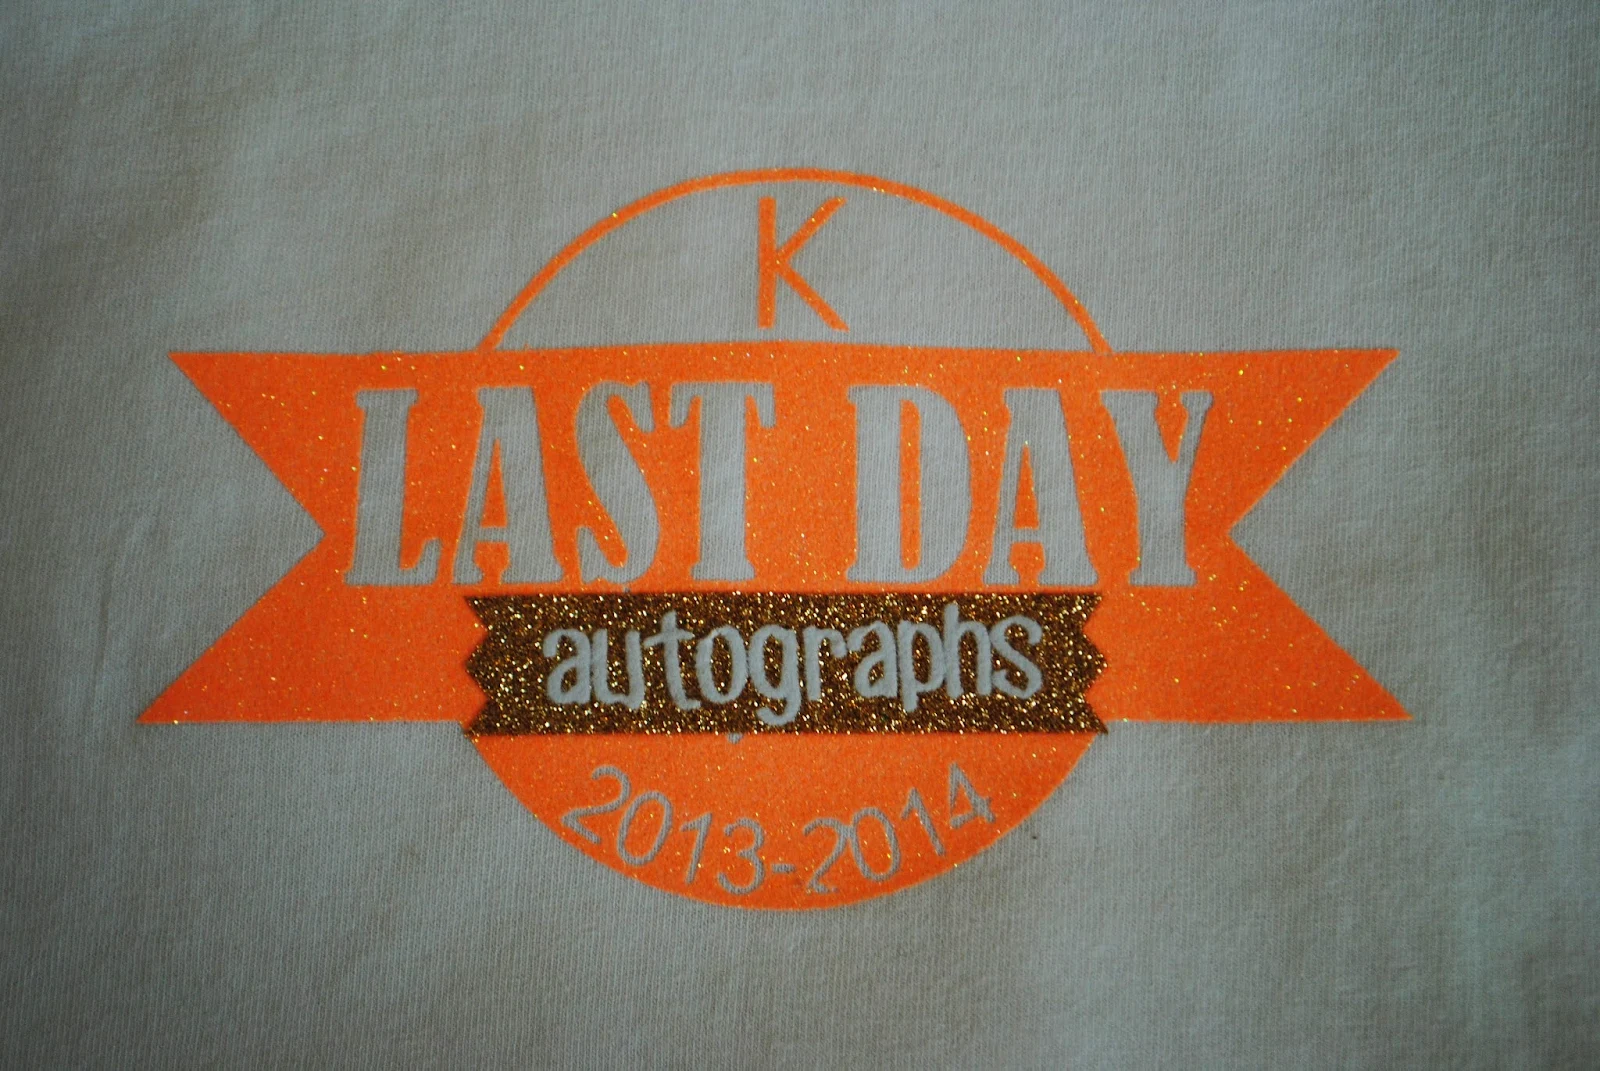
I have a confession to make...this has been the most frustrating project ever. Let's just say had I not promised my 5 year old I would make it for her for the last day of school, I would have bagged it 20 times over! Sorry for the ringing endorsement, I bet that just makes you want to jump right in, huh?
Admittedly, most of the hiccups were user error. See that gold glitter HTV banner? Yeah, it wasn't supposed to be there...but it's hiding a big ol' screw up. See that cutout around the K? Yeah, the circle was supposed to be solid and it was supposed to say "kindergarten" not just "K". I am only pointing all this out because I want you all to know that even us experienced Silhouette users run into trouble... I did manage to get it back on track and save the project which was half the "fun."
Now to make this a whole heck of a lot easier on you I'm going to give you the free .studio cut file (one mirrored and one not in both V2 and V3). FOR PERSONAL USE ONLY!
I'm also going to suggest you do one of the following (click the link to hop over for more info/tutorials):
1. Print and Cut the design on Square1 Iron Ons (easiest method)
2. Cut on regular heat transfer vinyl (101 HTV lesson here)
3. Make a freezer paper stencil, then paint on the design using craft paint
NOTE: I'll have a beginner-level tutorial and review on glitter HTV (this is from Expressions Vinyl) next week.
Using the free .studio file provided above, go ahead and change anything you need to change to personalize it (use the mirrored image if you're using HTV and the regular image if you're using freezer paper or Iron Ons), and when you are ready then cut it.
With the exception of SQ1 Iron Ons, you'll need weed the design carefully - there are a lot little areas between the letters and numbers. Place the stencil, iron on or HTV (shiny side up) onto your shirt and iron it on.
1. Square1 Iron Ons: Iron for 15 seconds on Cotton Setting (no steam)
2. Freezer Paper: Iron on to seal the freeze paper onto the shirt, then paint and peel off the stencil
3. HTV: Cover the design with a thin piece of fabric, using a lot of pressure, press down the iron (Cotton Setting, No Steam) onto the design for at least 1 minute.
See...I knew you'd have an easier time than me, right?!
Get out your fabric pens and let your child's classmates go crazy! SCHOOL's OUT FOR THE SUMMER (unless you're in Silhouette School).
On a side note....I am not nearly as happy that kindergarten is over for my baby girl. I can't believe she's already headed to first grade!!
What's been your most frustrating Silhouette project and how did you save it? Or did you just throw up your hands and move onto the next one? Leave a comment below.
Note: This post may contain affiliate links. By clicking on them and purchasing products through my links, I received a small commission. That's what helps fund Silhouette School so I can keep buying new Silhouette-related products to show you how to get the most out of your machine!
Thanks for coming to class today at Silhouette School. If you like what you see, I'd love for you to pin it!
Admittedly, most of the hiccups were user error. See that gold glitter HTV banner? Yeah, it wasn't supposed to be there...but it's hiding a big ol' screw up. See that cutout around the K? Yeah, the circle was supposed to be solid and it was supposed to say "kindergarten" not just "K". I am only pointing all this out because I want you all to know that even us experienced Silhouette users run into trouble... I did manage to get it back on track and save the project which was half the "fun."
Now to make this a whole heck of a lot easier on you I'm going to give you the free .studio cut file (one mirrored and one not in both V2 and V3). FOR PERSONAL USE ONLY!
1. Print and Cut the design on Square1 Iron Ons (easiest method)
2. Cut on regular heat transfer vinyl (101 HTV lesson here)
3. Make a freezer paper stencil, then paint on the design using craft paint
NOTE: I'll have a beginner-level tutorial and review on glitter HTV (this is from Expressions Vinyl) next week.
Using the free .studio file provided above, go ahead and change anything you need to change to personalize it (use the mirrored image if you're using HTV and the regular image if you're using freezer paper or Iron Ons), and when you are ready then cut it.
With the exception of SQ1 Iron Ons, you'll need weed the design carefully - there are a lot little areas between the letters and numbers. Place the stencil, iron on or HTV (shiny side up) onto your shirt and iron it on.
1. Square1 Iron Ons: Iron for 15 seconds on Cotton Setting (no steam)
2. Freezer Paper: Iron on to seal the freeze paper onto the shirt, then paint and peel off the stencil
3. HTV: Cover the design with a thin piece of fabric, using a lot of pressure, press down the iron (Cotton Setting, No Steam) onto the design for at least 1 minute.
See...I knew you'd have an easier time than me, right?!
Get out your fabric pens and let your child's classmates go crazy! SCHOOL's OUT FOR THE SUMMER (unless you're in Silhouette School).
On a side note....I am not nearly as happy that kindergarten is over for my baby girl. I can't believe she's already headed to first grade!!
What's been your most frustrating Silhouette project and how did you save it? Or did you just throw up your hands and move onto the next one? Leave a comment below.
Note: This post may contain affiliate links. By clicking on them and purchasing products through my links, I received a small commission. That's what helps fund Silhouette School so I can keep buying new Silhouette-related products to show you how to get the most out of your machine!
Thanks for coming to class today at Silhouette School. If you like what you see, I'd love for you to pin it!
Subscribe to:
Posts (Atom)




.jpg)






.png)
